|
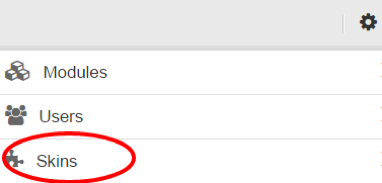
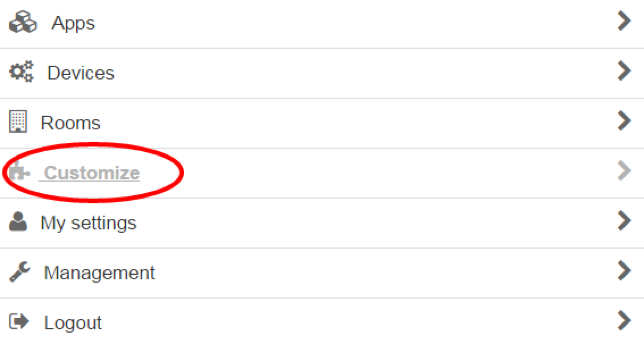
Wouldn’t it be cool to have your own individual user interface controlling your own individually designed Smart Home? Z-Way offers you exactly this feature—it is called 'Skin'. The Skin is a software package redefining all visual elements of your mobile and browser interface including images, fonts, colors, wallpaper, etc. Figure 10.1 shows the menu option for customization on the setup menu in the user interface.
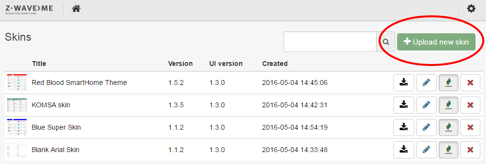
Designing a new skin from scratch is a lot of work. It is easier to choose an already existing skin. Go to Setup > Management > Customize and activate a new skin. You can also download skins from the online server.
A skin consists of a set of images and a description file for fonts, colors, etc., called CSS (Cascaded Style Sheets). See Annex A for links to more information about CSS.
The starting point for a new skin is a blank template you can download from
http://github/z-wave-me/Skin-blank.
This file is a zip archive you need to unzip into a temporary folder. This folder contains two sub folders:
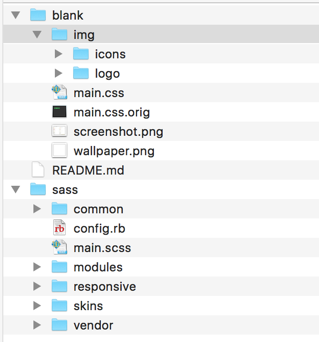
Images are a central part of any skin. As shown in Figure 10.2 the /blank/img subdirectory contains two sub-directories and two files:
There are plenty of tools to redesign and change images. This short write up will not explain this in detail but the Internet if full of resources for image editing. Just a few remarks:
Hint: The easiest change of a skin is just to replace the wallpaper image by something individual.
A quick way to test a new skin is to load it directly to your Smart Home gateway running the Z-Way controller software. This is possible for all Z-Way installations running on a PC (Linux, Windows) or on a Raspberry PI. Z-Way installations on other “closed’’ boxes such as Z-Wave.Me Hub are not suited for such a quick test drive—sorry!
First of all you need to choose the “Default Skin’’ in your Z-WAY SMART HOME INTERFACE on Setup > Management > Customize. Only the Default Skin can be changed in the quick way described below.
Then you need a way to copy files of your new Skin on the Z-Way installation. This can be done using simple file copy (when developing on the PC running Z-Way) or using FTP. You can replace all images by copying them into the folder.
/opt/z-way-server/automation/storage/images/.
One exception is the wallpager.png which is in the folder
/opt/z-way-server/htdocs/smarthome/app/css
like the main.css that holds all other settings.
Once a new file is changed or uploaded reload the UI on your browser or restart your native app, and voila, your changes are visible.
Hint: To test a new wallpaper, just copy your file of choice to
/opt/z-way-server/htdocs/smarthome/app/css/wallpaper.png
and reload the page.
Colors, fonts, etc. are all controlled by the file main.css. Open this file in a text editor and you will be shocked by the about 10.000 lines of code. If you are a CSS pro you may be able to edit this but this is not the recommended way to do this. CSS is great tool for shaping web pages but it has much legacy that makes it hard to edit manuals. However, if you really like to go that route Annex B will provide you some hints where to find the important lines of code. Use at your own risk—you are warned.
SASS is a preprocessor for generating CSS files. It extends CSS syntax and adds a few very useful functions such as central variables. This and a few other advantages caused many web designers moving away from writing CSS directly but using SASS.
The disadvantage is that you need to have another software on your developer PC translating the SASS files into the final CSS (main.css). Annex B provides some links to SASS tutorials and to some tools to translate from SASS into CSS.
We recommend the tool “Scout’’ because it works equally well on Windows and on MAC, is well documented and does most of the magic automatically.
www.youtube.com/watch? v=Fju3aXW6zLM&feature=youtu.be
for instructions on how to set up and use Scout.
Few Hints:
Finally we come to the point of making a real new Skin by changing the layout, color and font definitions of the blank skin. For this you need to edit the sass files provided with the blank skin. The central sass file is main.scss. It does not contain any layout definitions but loads all the other needed files only. The idea behind sass is among others to have different functions separated into different files. For the Skin in Z-Way however 98 % of all changes will happen in only one file - /common/_variables.scss. This file contains all major definitions for colors, shapes, sizes, fonts, etc.
Hint: A first run should be like:
In order to create a final skin file, a few more work needs to be done.
Just make a screenshot of the new skin as preview. For the skin selection in the Z-WAY SMART HOME INTERFACE the screenshot must be stored in the folder skinname/ and must be named screenshot.png Recommended dimension for this image is 300px X 150px.
You need a folder with the name of the skin. This contains the screenshot.png, the wallpager.png and the main.css plus the subfolder (img that has two further subfolders /logos and /icons)
![\begin{forest}
for tree={
font=\ttfamily ,
grow'=0,
child anchor=west,
pare...
...in.png]
[wallpaper.png]
[img
[logo/*.png]
[icons/*.png]
]
]
\end{forest}](img3.svg)
The whole folder needs to be packed now using ZIP archive program. On MAC please make sure to use the ZIP command line and not the built-in compression tool of the finder. This will not work. Move inside the folder of your skin (example above is /myskin) and execute “zip -r -X myskin.zip *.’’
For sure you will end up with skin attempts that don't work well. In a worst-case scenario, you can't even pick a different skin anymore and your default Skin was messed up. For such a case, there is an emergency reset Just call the URL
http://IP:8083/ZAutomation/api/v1/skins/setToDefault.
It is possible to add individual icon sets to the Z-Way and share it with others.
First to the icon as such. They must have a size of 64x64 pixel and must be encoded in PNG image file format. You are free to make every icon you can imagine. Please note that there is a list of typical devices where standard icons are applied:
Please note as well that certain elements need two or even three icons to indicate different status of their operation.
It is certainly possible to just replace the icons right in the User interface exchanging the file in the filesystem on /opt/zway-server but there is a much better way. Icons should be grouped into icon sets and should be placed on the server to be available for all Z-Way users. The grouped icons are called icon packs.
An icon pack is essentially a gz or zip archive file containing different icons. All icons need to be stored in a subfolder with the name of the icon set. The archive must then have the very same name. Only store the icons in the archive and not the subfolder itself! or Unix OS these commands will work:
The total size of the archive must not exceed 2 MB.
For this please register at
http://developer.z-wave.me/.
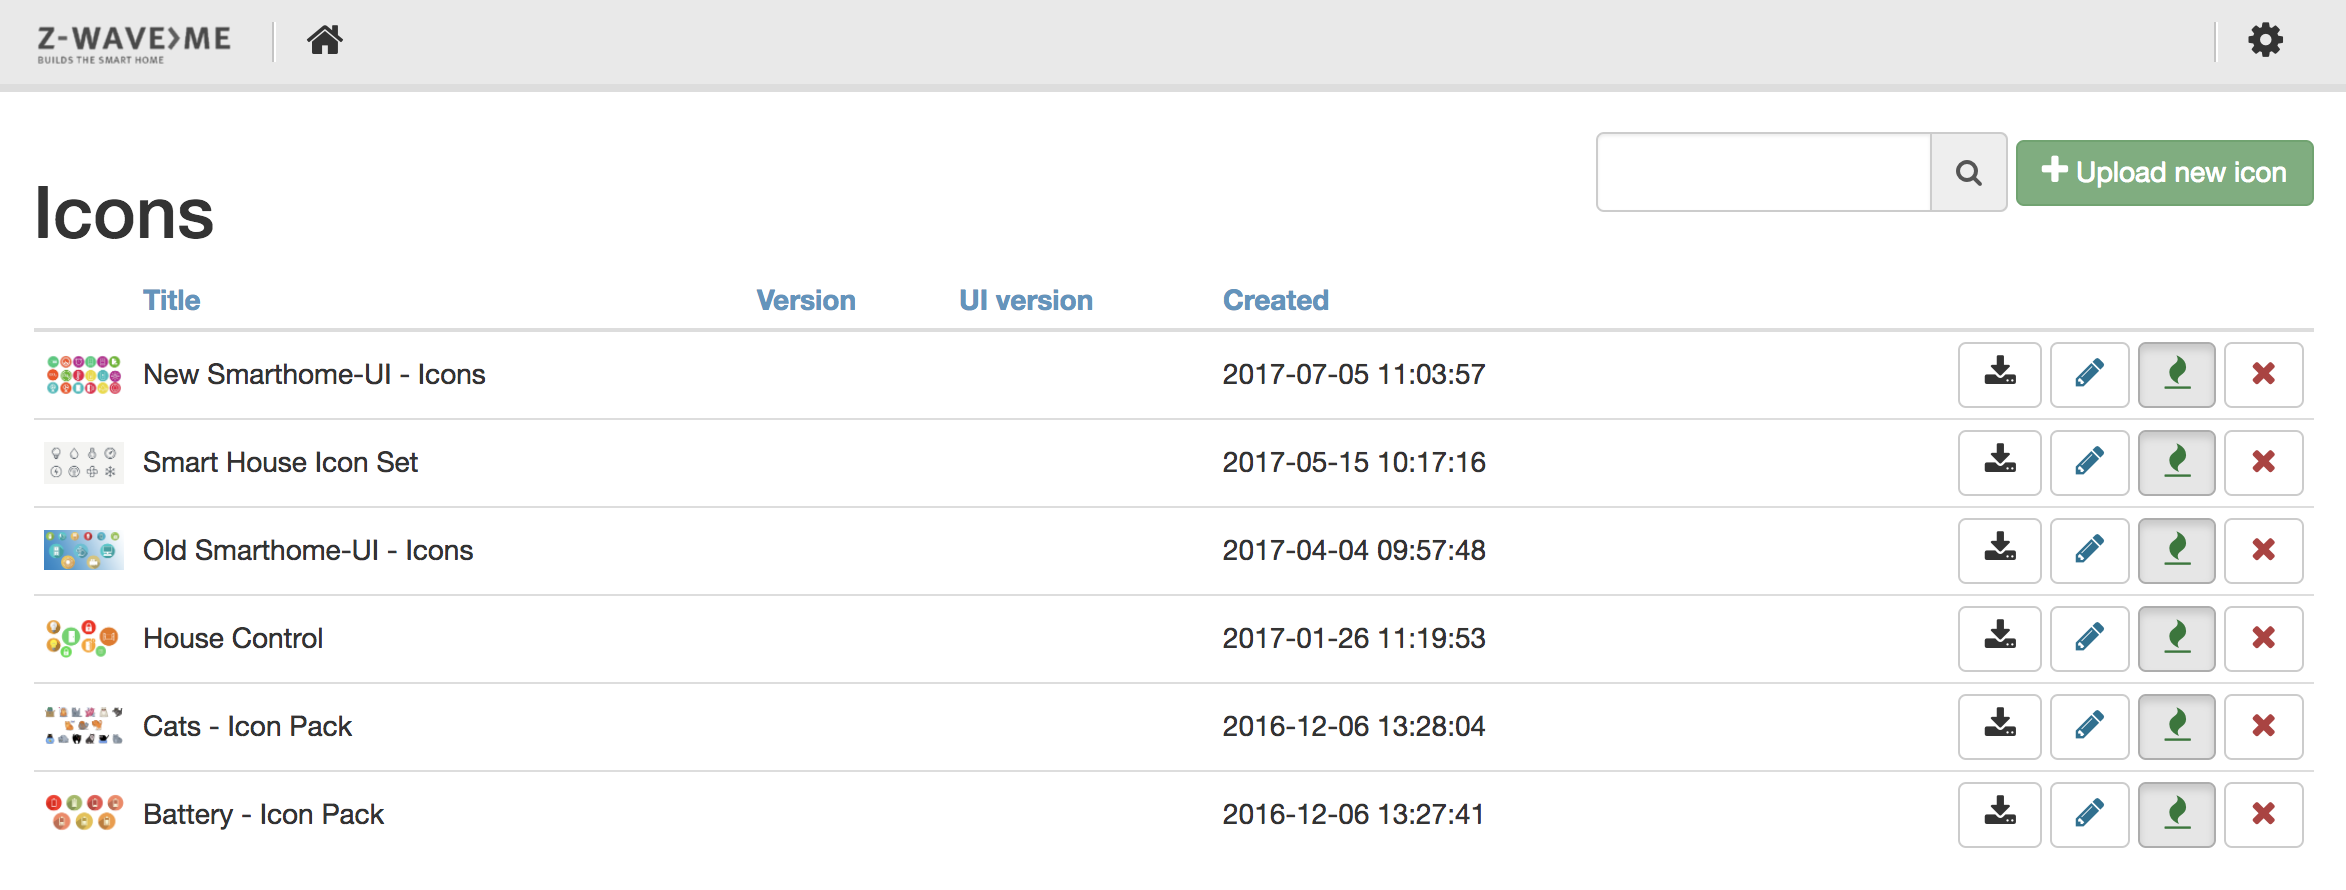
Once logged in, the right-hand side menu icon allows opening the icon set management dialog as shown in Figure 10.6
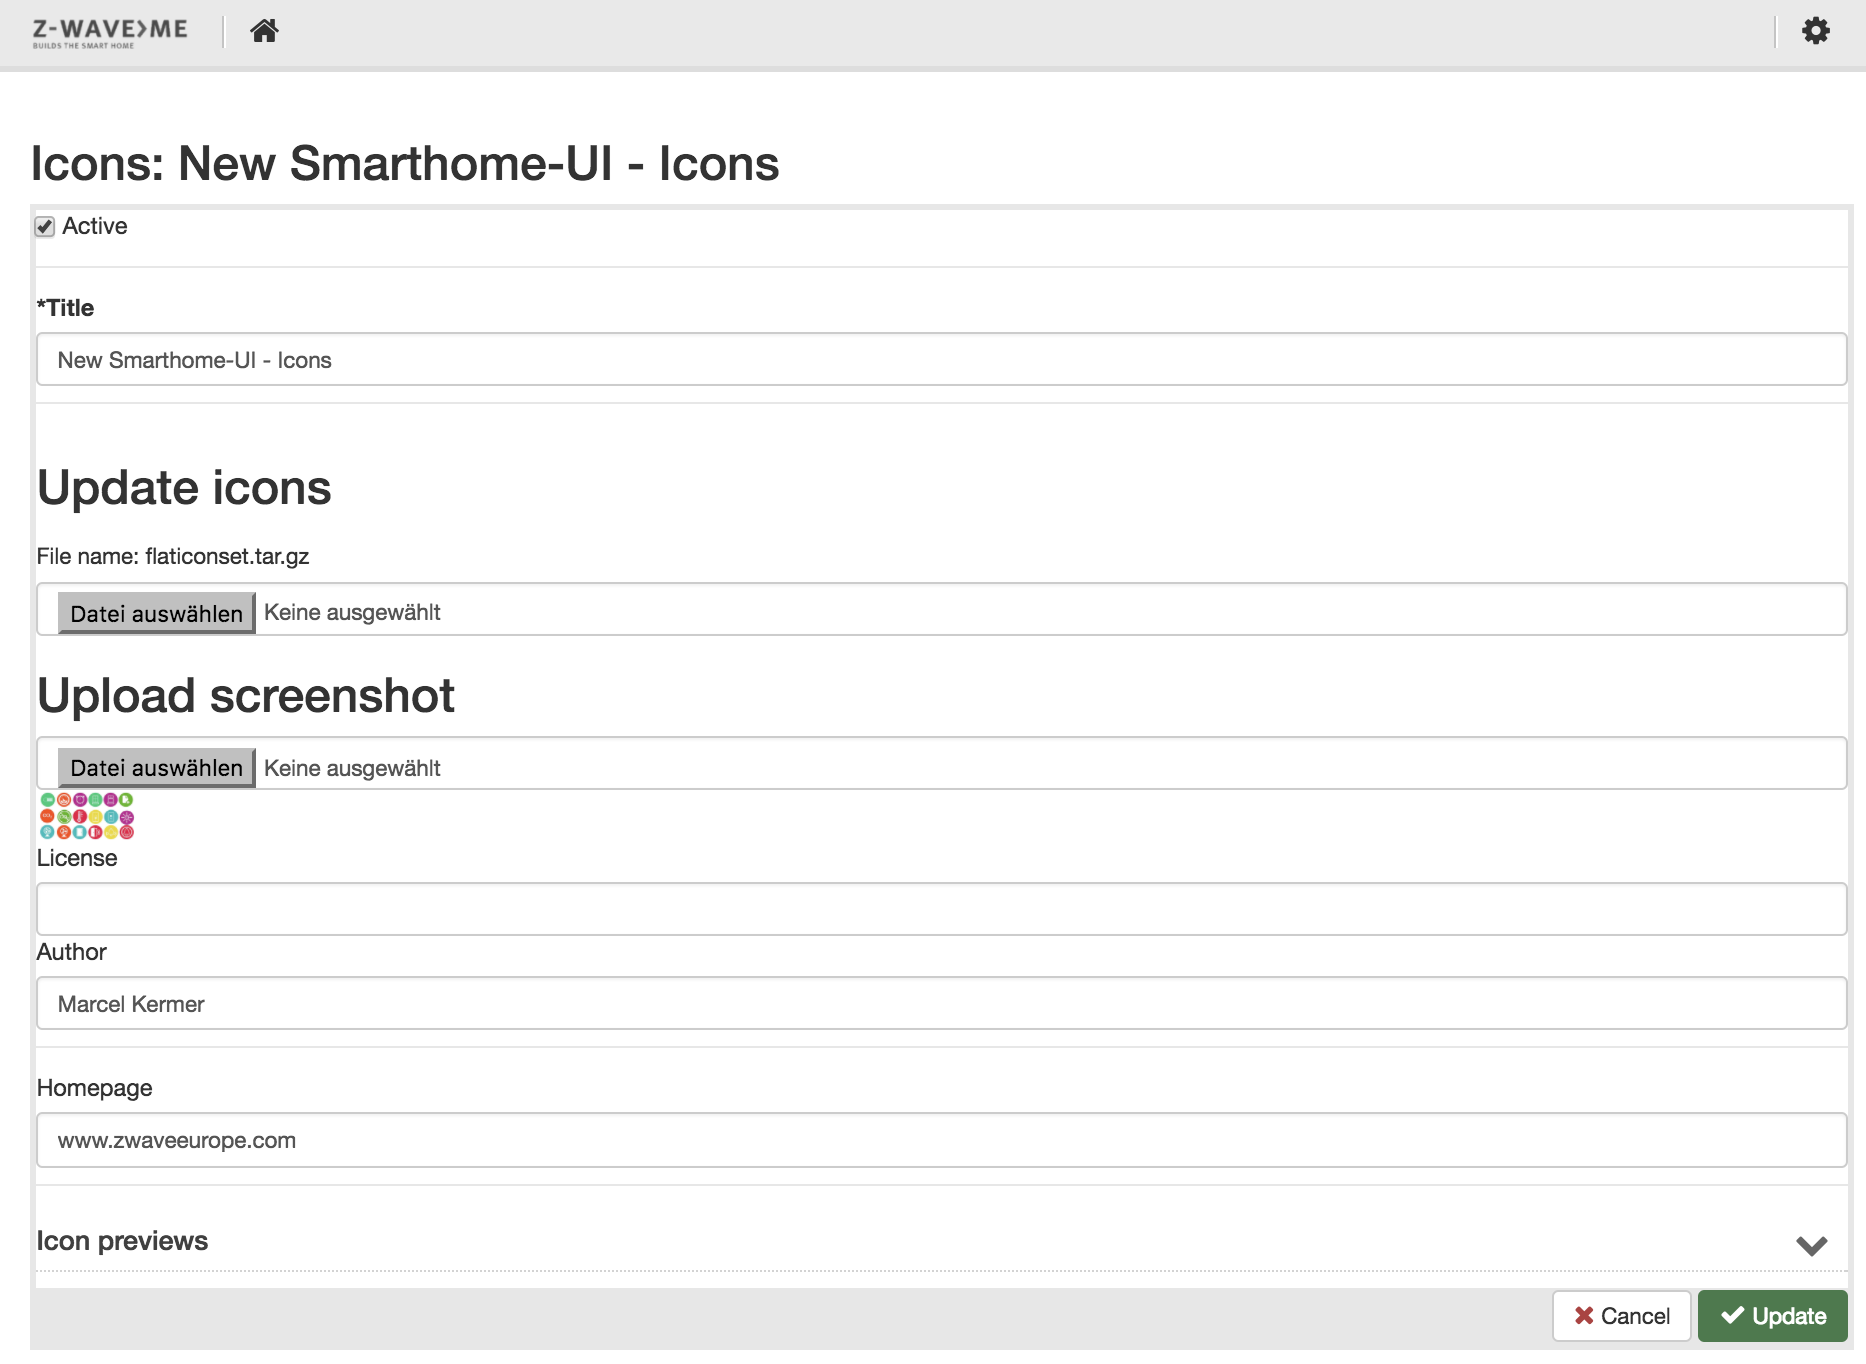
Here you can create a new Icon pack record and manage you existing ones:
Please choose the title of your icon pack and provide a screenshot. This is the image shown in the icon set preview as described in Section 4.2.3.
Z-Way operates with two different user interface both having its own translation engines and translation files. Additionally, the backend code will translate certain tokens already when handling the data. Finally, the applications from the app store may need to be translated as well.
You can call all relevant files from info@z-wave.me or download from GitHub
https://github.com/Z-Wave-Me/zwave-smarthome/tree/dev.
You can also use the installation of Z-Way on your system if you have access to the file system. The following tutorial assumes you have this access. This also allows you to translate the strings and subsequently test the new UI. All Z-Way code you find in the folder and subfolders of /z-way-server.
Please note that you can include your name, email, and company web page link to both UIs as a reward for doing the work.
All translation tokens for the Smart Home UI can be found in /htdocs/smarthome/app/lang. Just copy the file en.json to XX.json with XX as ISO 2 char code of your language. Start translating the new file into your language.
In app/config.js find a language list array “lang_list’’: ['en', 'de', 'ru', 'cn', 'fr']. Just add your 2-char code. In / htdocs /smarthome/app/images/flags the flag of your country/language needs to be added. The code expects the file name XX.png with a 24x24 pixel PNG image.
For the standardized form dialogs of the application setups you find the language tokens in app/core/config.js. The array “lang_codes’’ need to be extended by your language.
All translation tokens for the Smart Home UI can be found in /htdocs/expert/app/lang. Just copy the file en.json to XX.json with XX as ISO 2 char code of your language. Start translating the new file into your language.
In app/config.js find a language list array “lang_list’’: ['en', 'de', 'ru', 'cn', 'fr']. Just add your 2-char code.
The subfolder /translations contains some XML files that are required for backend actions and rendering. These renderings are done in the backend and used in both Browser Type User Interfaces. The main files to extend with own language are:
To alter and extend these files, please find out the ISO 2 char code of your language and add one line for each token.
Please send the translated language files XX.json plus your flag plus any changed XML
file zipped to info@z-wave.me for inclusion into the next release of the software.