![[*]](footnote.png) .
.
Z-Way is a complete software solution that is ported on various hardware. In order to run it on a certain hardware platform, the following requirements have to be met:
http://razberry.wave.me/z-way-serveryou will find the most recent releases of Z-Way binary distributions for the various platforms supported:
Please note that Z-Way will start on a certain platform without having a Z-Wave transceiver or a licensing key. However, in this case is no support for Z-Wave. Still, this may be a good starting point to test the software free of charge. Please refer to the section 6 for possible applications usable without having Z-Wave enabled.
Z-Wave.Me currents support two basic hardware platforms with Z-Way licensing:
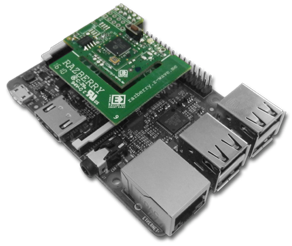
The RaZberry shield consists of a single PCBA with a connector to the standard GPIO pin header connector of the Raspberry Pi minicomputer. This 25-pin header connector is available on all contemporary Raspberry Pi versions, such as:
Even if your Raspberry Pi version is not on the list above, there is a very high chance
that the shield board will work as long as your Pi has the 25-pin GPIO connector. You will
find more information about the pinout of this 25-pin connector on various websites
.
You can use other pins of the connector for other purposes as long as they do not physically conflict with the board.
The RaZberry board use only four pins of this header connector:
Figure 2.1 shows how the board connects to the 25-pin header on a Raspberry Pi 2
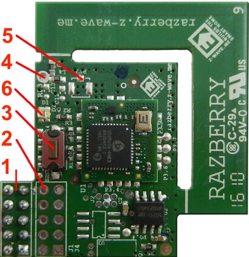
The board itself offers a few connection options as shown in Figure 2.2:
https://www.adafruit.com/products/1661for component details. You need to break off the PCBA antenna to make this work.
The two LEDs are used to indicate the success of the boot-up self-testing and as status indicators during normal operation.
When powered up, the two LEDs light up, indicating that the self-testing has started. After about two seconds, they are supposed to go off indicating that that self-testing has been passed successfully. If they remain lit, this is a clear indication that the self-test failed or the device is not booting up. You will need to replace the hardware in such a case.
During normal operation, the two LEDs remain turned off except:
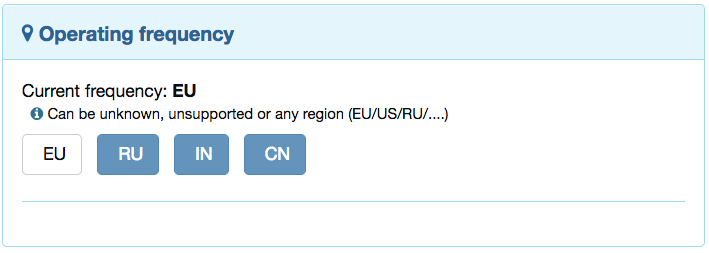
The RaZberry shield itself can be tuned into every frequency used by Z-Wave. However, to protect the transceiver and Z-Wave from high energy emissions on nearby frequencies (primarily 4G/LTE cellular radios using the 852 MHz frequency band), an external antenna filter is used. This limits the frequency changes to countries that share the same antenna filter. Currently, there are three antenna filter versions identified by their SKU codes.
There are two options to change the RaZberry operating frequency:
https://z-wave.me/download/changezwf.shJust execute the script with
changezwf.sh [COM Port] [US|EU|ANZ|…]
RaZberry is certified for use in different countries.
RaZberry complies with the new Radio Equipment Directive of the European Union in general and the EN 300 220 version 3.1.1 in particular. The device also complies with the European ROHs and REACH regulations.
The RaZberry shield was successfully tested for FCC. The FCC identifier is
2AAYUZMEURAZ.
The RaZberry shield is a certified hardware platform and a complete solution according to Z-Wave Plus. Please refer to the certification database
http://products.z-wavealliance.orgfor more details.
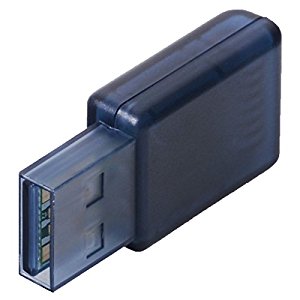
The USB Stick 'UZB' allows enabling Z-Way on various platforms. Figure 2.4 shows the device.
It is plugged into a free standard USB port. UNIX-based operating systems will recognize the stick and generate a virtual serial device named /dev/ttyACM0 or /dev/cu.usbmodem or similar. Windows will generate one virtual serial port COM XX.
Once Z-Way is started, it will connect to the Z-Wave hardware using this virtual serial device.
The USB stick is very small (presently the smallest Z-Wave device in the world) and will stick quite close to the enclosure of the PC or NAS. This may interfere with the wireless range. If you experience problems with the wireless range, please use a standard USB extender cable to get the UZB antenna further away from the PC.
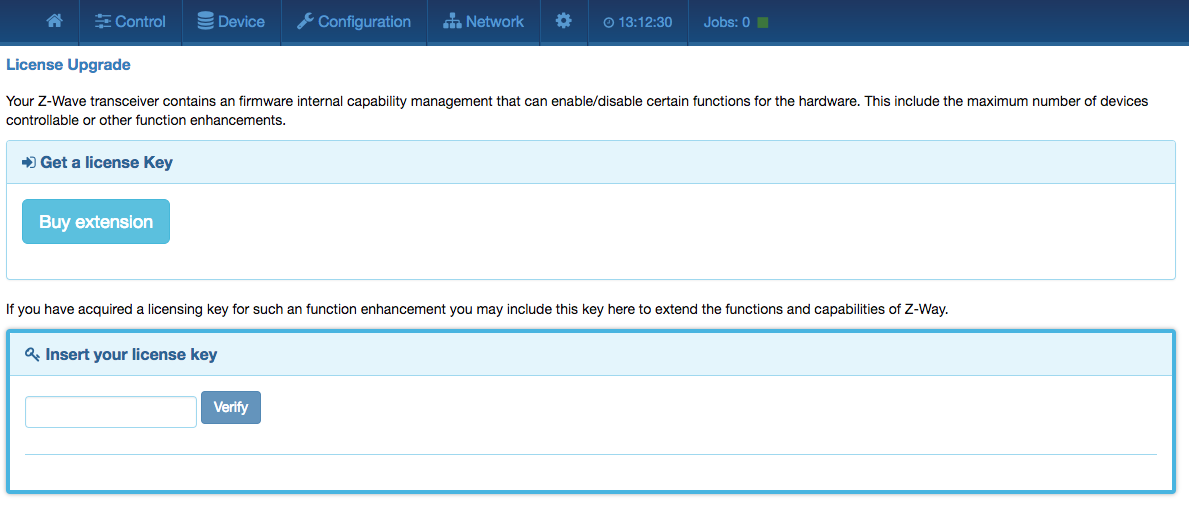
In case the UZB is not loaded with a Z-Way license (the stick is generally sold in two versions, one with a license and one without for use with 3rd party software), the license can be loaded once Z-Way is up and running. Please use the Z-WAVE EXPERT USER INTERFACE as described in Section 7 to apply the license. The license is a simple string that usually comes printed in a scratch card. Go to Network > Controller Info and click on the button License Upgrade. You will see a dialog as shown in Figure 2.5.
The Buy extension button leads you to instructions about how to extend the capabilities of the UZB stick by buying extra licensing files. The input field below allows inserting and applying the license key manually. Please note that:
In order to enable a second Z-Wave transceiver (dedicated onboard, UZB or RaZberry), please use the standard user interface as described in Chapter 4. Go to the app management section and start another instance of the app 'Z-WAVE NETWORK ACCESS'. Choose the new virtual serial device created by the new hardware.
Please note that the standard user interface will support devices from two networks, but you need to use the Z-WAVE EXPERT USER INTERFACE to manage the second network. The inclusion and exclusion functions of the standard user interface will always use the first Z-Wave network.
On being powered up, the blue LED will light up, indicating that the self-testing has started. After about two seconds, the LED goes off, indicating that that self-testing has been done successfully. If the LED remains lit, it means that the self-testing has failed or the device is not booting up. You will need to replace the hardware in such a scenario.
The Z-Wave transceiver itself can be tuned into every frequency used by Z-Wave. However, to protect the transceiver and Z-Wave from high energy emissions on nearby frequencies (primarily 4G/LTE cellular radios using the 852 MHz frequency band), an external antenna filter is used. This limits the frequency changes to countries that share the same antenna filter. As of now, there are three antenna filter versions identified by their SKU codes.
There are two options to change the UZB operating frequency:
https://z-wave.me/download/changezwf.shJust execute the script with
changezwf.sh [COM Port] [US|EU|ANZ|…]
The UZB is certified for use in different countries.
The UZB complies with the new Radio Equipment Directive of the European Union in general
and the EN 300 220 version 3.1.1 in particular. Full CE declaration can be found in
Annex ![[*]](crossref.png) .
The device also complies with the European ROHS and REACH regulations.
.
The device also complies with the European ROHS and REACH regulations.
The UZB stick shield was successfully tested for FCC. The FCC identifier is
2AAYUZMEUUZB.
The UZB USB stick is a certified hardware platform and a complete solution according to Z-Wave Plus. Please refer to the certification database
http://products.z-wavealliance.orgfor more details.
It is possible to port Z-Way to other hardware platforms beyond what is supported by binary distributions. Before contacting the Z-Wave.Me team, you can check if your platform meets the requirements for Z-Way to run on. The general requirements are:
There is a simple test to check if certain hardware on a platform is capable of running Z-Way. Follow the instructions given on
http://razberry.z-wave.me/index.php?id=28.
Only after you have double-checked that a binary distribution runs on your system or that
the compatibility test has been passed, you may want to contact the Z-Wave.Me team for
further discussions about porting and licensing fees.